Bountiful Birds & Words Wall Hanging
Let's make a beautiful wall hanging! This project uses:
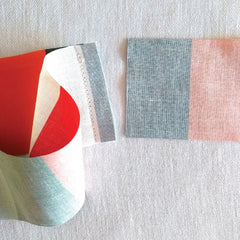
- Bountiful Birds and Words fat quarter project panel
- Solid in Moonlight (fat quarter)
- Stripe in Multi (2") (fat quarter)
- Batting
- Backing fabric of your choice
1. Cut the project panel to separate the birds from the squares. Leave a quarter inch seam allowance along the left edge of the squares.

2. For the inner border, cut 4 strips from the Bountiful Moonlight fat quarter. Cut parallel to the selvage. Each strip should be 2" wide and an inch or two longer than the side of the project panel where you'll be attaching it.

3. Start with the left edge. Place a border strip on the panel fabric, right sides facing. Align the left edges. Pin the fabric in place, starting from the middle and working your way towards each end, smoothing the fabric as you go.
Sew the strip to the panel, using the outer edges of the panel squares (visible through the border strip) as a guide to achieve a straight stitching line. This is about a quarter inch seam allowance. After sewing each border strip, trim the top and bottom edges of the strip so it's flush with the panel.
Sew the strips to the panel in the following order: left side, right side, top, bottom. This order will help the panel remain square.


4. Press the seams. I sewed the left and right border strips, then trimmed and pressed each. Then I sewed the top and bottom border strips and trimmed and pressed those.

5. For the outer border, cut 6 strips from the Bountiful Multi fat quarter. Cut selvage to selvage. Each strip should be 2" wide.
First prepare the strips that will go across the top and bottom of the panel. These strips should be about an inch longer than the panel width.
Place a strip across the top of the panel, right sides facing. Align the edges. Use rulers or straight edges to make sure the strip is aligned vertically and horizontally with the project panel. Pin the strip to the panel, starting in the middle and pinning out to each edge, smoothing the fabric as you go. Sew the strip to the panel with a quarter inch seam allowance. Trim the edges and press the seams. Follow these instructions to sew the bottom strip to the panel.


6. The strips for the left and right sides of the panel won't be long enough, so you'll have to sew two strips together to achieve the needed length. To do this, place two strips right sides facing. Sew one of the short edges of the strips together with a quarter inch seam allowance. Trim any excess fabric and press the seam.


7. Sew the strips to the left and right sides of the panel, following the instructions in Step 5: right sides facing, align the edges, pin, sew, trim, press. Remember to square up your edges before pinning and sewing.
8. Cut your batting so it's an inch or two longer than the panel on all sides. Place the batting under the quilt top. The quilt top should be right side up, with the batting underneath.
9. Use safety pins to attach the quilt top to the batting. Start by pinning in the middle of each border strip (left, right, top, bottom), smoothing as you go, and adding a pin along the length of each side (alternating left, right, top, bottom) until you've pinned the entire perimeter. This approach will help the panel stay square.
10. Quilt the front of the wall hanging to the batting. I've placed 2 dashed lines in the photograph below to show where I quilted. You can do as much or as little quilting as you'd like for this step. Keep in mind that you'll be doing more quilting once the backing fabric is attached.

11. Trim the batting so it's flush with the edges of the quilt top. Remove the safety pins.
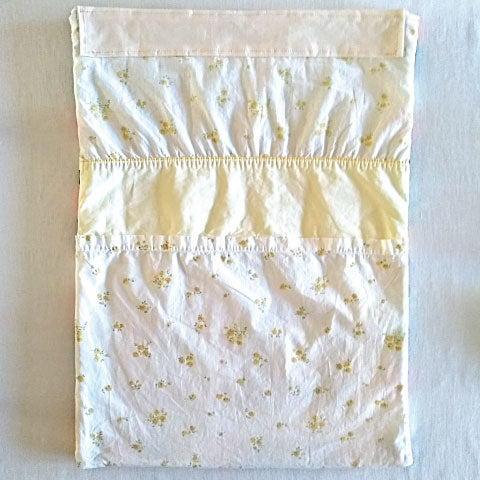
12. Prepare 2 pieces of backing fabric. I used an old bed sheet. Each piece should be just over half the length of the quilt top and an inch or two wider. Place the bottom piece of backing fabric with the right side facing the panel, pin, and sew along the 3 edges. Do not sew across the panel. Trim excess fabric around the border and press the seams.

13. Before attaching the top half of the backing, make a sleeve for hanging and attach it to the top of the backing. To make the sleeve, use the remainder of the Bountiful Moonlight solid fabric, trimming it to about 2 inches wide and 2 inches shorter than the width of the panel. Hem the short sides.

14. Place the sleeve on the top half of the backing fabric. With the quilt top underneath, make sure the sleeve is positioned where you want it on the backing fabric. Pin the sleeve to the backing fabric (but not to the quilt top/batting), making sure it's square to the edges of the panel underneath so the final piece will hang straight. Topstitch the 2 long sides of the sleeve to the right side of the backing fabric.

15. Place the top half of the backing fabric on the quilt top/batting, right sides facing. Make sure the sleeve is aligned the way you want it. Square up the backing fabric carefully and pin in place. Sew around the 3 edges. Do not sew across the panel. Trim the edges and press the seams.


16. Trim any excess fabric around the edges and carefully trim away excess fabric at each corner.

17. Reach into the opening where the 2 pieces of backing fabric meet and turn the quilt sandwich right side out. Use your fingers or a blunt tool to gently push out each corner.
18. Stitch the opening closed between the 2 backing fabrics using a simple running stitch or whip stitch.
19. Do more quilting to secure the quilt top/batting to the backing fabric. You could quilt around the outer and/or inner borders of each square, around the circles inside each wreath, around the outer borders, between the squares, or any other way you'd like!
To save time at this step, I added simple cross stitches with matching thread where the corners of the squares meet (12 total):

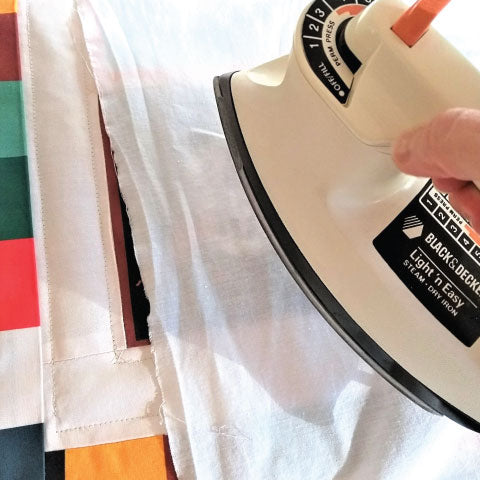
20. Press, placing a piece of fabric between the wall hanging and the iron to avoid unwanted marks on your finished piece.
21. Cut a wooden bar or dowel to the desired length and insert through the sleeve. Cut a ribbon to the desired length for hanging and tie it to each end of the bar or dowel. Your wall hanging is done!


Ready to make some magic with the individual birds from this panel? Head over to the Bountiful Bird Mobile tutorial.